 Lạc Việt nhà phân phối KROHNE ngành nướcKROHNE water-sector distributor
Handbook tương tác · lắp đặt & vận hành · song ngữInteractive handbook · installation & operation · bilingual
Hướng dẫn hiện trường cho cảm biến OPTIFLUX 2000 + converter IFC 300: lắp đặt, tiếp địa, đấu dây, khởi động, menu, tra lỗi và nghiệm thu – mỗi bước ghi trang manual gốc.Field guide for the OPTIFLUX 2000 sensor + IFC 300 converter: installation, grounding, wiring, start-up, menu, troubleshooting and commissioning – every step cites the original manual page.


OPTIFLUX 2000 / IFC 300 chỉ dùng để đo lưu lượng (và độ dẫn điện) của chất lỏng dẫn điện.OPTIFLUX 2000 / IFC 300 are designed exclusively to measure the flow (and conductivity) of electrically conductive liquid media. MA-S p.5MA-C p.8
IFC 300 là thiết bị Group 1, Class A theo CISPR11, dùng cho môi trường công nghiệp; ở môi trường khác có thể khó đảm bảo tương thích điện từ.IFC 300 is a Group 1, Class A device as specified within CISPR11, intended for industrial environments; EMC may be difficult to ensure in other environments. MA-C p.8
| DANGERDANGER | Nguy hiểm tức thời (điện, bề mặt nóng, khí quyển nổ). Bỏ qua dù một phần có thể gây tổn hại nghiêm trọng hoặc tử vong.Immediate danger (electricity, hot surfaces, hazardous atmosphere). Even partial disregard can lead to serious health problems and even death. | MA-S p.8 |
|---|---|---|
| WARNINGWARNING | Nguy cơ tổn hại sức khỏe nghiêm trọng hoặc hỏng thiết bị/nhà máy.Risk of serious health problems or damage to the device or plant. | MA-S p.8 |
| CAUTIONCAUTION | Có thể làm hỏng thiết bị hoặc nhà máy.Can result in damage to the device or plant. | MA-S p.8 |
| INFORMATIONINFORMATION | Thông tin quan trọng khi thao tác.Important information for handling. | MA-S p.8 |
| LEGAL NOTICELEGAL NOTICE | Thông tin về luật/tiêu chuẩn.Statutory directives and standards. | MA-S p.8 |

MA-S p.9
MA-S p.12MA-C p.18

MA-S p.12MA-C p.18

Quét mã Data Matrix (Auto ID) để vào PICK server của KROHNE: handbook, quick start, chứng chỉ hiệu chuẩn, file cài đặt nhà máy (.bin), parameter data sheet, nameplate số.Scan the Data Matrix (auto ID) code to reach the KROHNE PICK server: handbooks, quick starts, calibration certificates, factory settings (.bin), parameter data sheets, digital nameplates. MA-S p.11MA-C p.16
| ①① | Thông tin phê duyệt: Ex, chứng nhận thử kiểu EC, hygienic…Approvals-related information: Ex approval, EC type test certificate, hygienic approvals, etc. | MA-C p.16 |
|---|---|---|
| ②② | Ngưỡng liên quan phê duyệtApprovals-related thresholds | MA-C p.16 |
| ③③ | Mã Data MatrixData Matrix code | MA-C p.16 |
| ④④ | Dữ liệu phê duyệt (ngưỡng nhiệt độ, áp suất)Approvals-related data (temperature and pressure thresholds) | MA-C p.16 |
| ⑤⑤ | Nguồn cấp, cấp bảo vệ, vật liệu tiếp xúc môi chấtPower supply, ingress protection and materials of wetted parts | MA-C p.16 |
| ⑥⑥ | Phiên bản phần mềm (Electronic Revision)Software revision number (Electronic Revision) | MA-C p.16 |
| ⑦⑦ | GK/GKL (hằng số cảm biến), DN và tần số kích từGK/GKL (flow sensor constants), size and field frequency | MA-C p.16 |
| ⑧⑧ | Hướng dẫn an toàn, thải bỏ, China RoHSSafety instructions, disposal and China RoHS marking | MA-C p.16 |
| ⑨⑨ | Tên sản phẩm, serial, ngày/nước sản xuất, mã CG, dấu hợp chuẩnProduct designation, serial number, manufacturing date and country, CG number, conformity mark | MA-C p.16 |
Nameplate dữ liệu I/O: A = active (converter cấp nguồn cho thiết bị sau), P = passive (cần nguồn ngoài), N/C = cực không dùng. Nguồn: AC: L, N; DC: L+, L−; PE cho ≥ 24 VAC; FE cho ≤ 24 VAC và DC.I/O nameplate: A = active (converter supplies the connected devices), P = passive (external supply required), N/C = not connected. Power: AC: L and N; DC: L+ and L-; PE for ≥ 24 VAC; FE for ≤ 24 VAC and DC. MA-C p.17
| Cảm biếnSensor | Compact (C)Compact (C) | Field rời (F)Remote field (F) | Treo tường (W)Remote wall (W) | Rack (RL)Remote rack (RL) |
|---|---|---|---|---|
| OPTIFLUX 2000 | OPTIFLUX 2300 C | OPTIFLUX 2300 F | OPTIFLUX 2300 W | OPTIFLUX 2300 RL |
MA-S p.13
MA-S p.13


Để đạt độ chính xác cao nhất, tuân thủ đoạn thẳng khuyến nghị. Cảm biến kết hợp IFC 300 có thể lắp cấu hình 0D/0D (không cần đoạn thẳng) – điều kiện và cấp chính xác xem mục OIML/MID và chứng chỉ OIML R49 / MID MI-001.For the highest accuracy, respect the recommended inlet and outlet lengths. In combination with the IFC 300, the sensor can be installed in a 0D/0D configuration – for conditions and accuracies see OIML/MID sections and the OIML R49 / MID MI-001 certificates. MA-S p.14
Hình: Figure: Đoạn thẳng khuyến nghị: ① xem mục co 2/3 chiều; ② ≥ 2 DNRecommended inlet/outlet: ① see "bends in 2 or 3 dimensions"; ② ≥ 2 DN MA-S p.14 xem hình trên trang Datasheetsee figure on the Datasheet page ↗
Hình: Figure: Co 2 chiều (X/Y): đoạn trước ≥ 5 DN; co 3 chiều (X/Y/Z): ≥ 10 DNBends in 2 dimensions (X/Y): inlet ≥ 5 DN; in 3 dimensions (X/Y/Z): ≥ 10 DN MA-S p.14 xem hình trên trang Datasheetsee figure on the Datasheet page ↗
Co 2 chiều nằm trong một mặt phẳng (đứng hoặc ngang); co 3 chiều nằm trong cả hai mặt phẳng.2-dimensional bends occur in a vertical or horizontal plane (X/Y) only; 3-dimensional bends occur in both planes (X/Y/Z). MA-S p.14
Hình: Figure: Lắp ở đoạn ống co 90°Installation in bending pipes (90°) MA-S p.15 xem hình trên trang Datasheetsee figure on the Datasheet page ↗
MA-S p.15
Hình: Figure: Lắp ở đoạn ống co 45°Installation in bending pipes (45°) MA-S p.15 xem hình trên trang Datasheetsee figure on the Datasheet page ↗
Hình: Figure: Sau ngã ba T: ① ≥ 10 DNBehind a T-section: ① ≥ 10 DN MA-S p.16 xem hình trên trang Datasheetsee figure on the Datasheet page ↗
Hình: Figure: Lắp trước điểm xả hở: tạo đoạn ống vòng lên để ống đo luôn đầyIn front of an open discharge: keep the meter full (rising loop before discharge) MA-S p.16 xem hình trên trang Datasheetsee figure on the Datasheet page ↗
Hình: Figure: Lắp trước van điều khiểnIn front of a control valve MA-S p.17 xem hình trên trang Datasheetsee figure on the Datasheet page ↗
Nên lắp trước van điều khiển. Có thể lắp sau van nếu không có xâm thực (nhiễu profile đã ổn định).Recommended position is upstream of a control valve. Downstream is possible if there is no cavitation (flow profile disturbances resolved). MA-S p.17
Hình: Figure: Lắp sau bơmBehind a pump MA-S p.17 xem hình trên trang Datasheetsee figure on the Datasheet page ↗
Nên lắp sau bơm, ở vị trí nhiễu dòng do bơm đã ổn định. Có thể lắp ở ống hút nếu không có xâm thực.Recommended position is downstream of a pump, where pump disturbances are resolved. The suction line is possible if there is no cavitation. MA-S p.17
Hình: Figure: Xả khí: ① ≥ 5 m; ② điểm xả khíAir venting: ① ≥ 5 m / 17 ft; ② air ventilation point MA-S p.18 xem hình trên trang Datasheetsee figure on the Datasheet page ↗
Hình: Figure: Chân không: ① ≥ 5 mVacuum: ① ≥ 5 m / 17 ft MA-S p.18 xem hình trên trang Datasheetsee figure on the Datasheet page ↗
Hình: Figure: Độ lệch mặt bích: Lmax − Lmin ≤ 0.5 mmFlange deviation: Lmax - Lmin ≤ 0.5 mm / 0.02" MA-S p.19 xem hình trên trang Datasheetsee figure on the Datasheet page ↗
Hình: Figure: Tư thế lắp: hộp đấu nối/converter hướng lên hoặc xuốngMounting position: converter/connection box aligned upwards or downwards MA-S p.19 xem hình trên trang Datasheetsee figure on the Datasheet page ↗
MA-S p.19
Hình: Figure: ① Ngập nước; ② chôn ngầm① Submersible; ② buried MA-S p.20 xem hình trên trang Datasheetsee figure on the Datasheet page ↗
Theo MA-S: cảm biến OPTIFLUX 2000 đạt IP68, NEMA 6P, phù hợp ngập liên tục trong hố đo, chịu cột nước 10 m; có thể chôn ngầm (lớp phủ tùy chọn cho chôn ngầm). Converter bản rời (IFC 300) là IP66/67, NEMA 4/4X – đặt chỗ khô trên tường hố đo để đọc màn hình.Per MA-S: the OPTIFLUX 2000 sensor is rated IP68, NEMA 6P and suitable for continuous submersion in flooded chambers, withstands a 10 m water column and can be buried (optional coating for subsurface application). The remote IFC 300 converter is IP66/67, NEMA 4/4X and is installed in a dry area on the pit wall for visual read-out. MA-S p.20
Hình: Figure: Hố đo: ① ngập liên tục; ② bản rời; ③ cột nước tối đa 10 mMeasuring pit: ① continuous submersion; ② remote version; ③ max. water column 10 m / 33 ft MA-S p.20 xem hình trên trang Datasheetsee figure on the Datasheet page ↗
Lạc ViệtDatasheet (TD) ghi IP68 là tùy chọn cho bản rời có hộp đấu nối inox, còn MA-S ghi cảm biến "rated IP68". Khi chào hàng/đặt hàng cho hố ngập, luôn ghi rõ IP68 trong order code và xác nhận với KROHNE.The TD lists IP68 as an option for the separate design with stainless steel connection box, while MA-S states the sensor is "rated IP68". For flooded pits always specify IP68 in the order code and confirm with KROHNE.

MA-S p.21
Giá trị áp suất và mô-men là lý thuyết, tính cho điều kiện tối ưu với bích thép carbon; phụ thuộc nhiệt độ, vật liệu bulông, gioăng, chất bôi trơn – chỉ mang tính tham khảo.Max. pressure and torque values are theoretical, calculated for optimum conditions with carbon steel flanges; they depend on temperature, bolt and gasket material, lubricants – indicative only. MA-S p.21–22
| DNDN | PNPN | BulôngBolts | PolypropylenePolypropylene | Hard rubberHard rubber |
|---|---|---|---|---|
| 25 | PN 40 | 4 x M 12 | 22 | 11 |
| 32 | PN 40 | 4 x M 16 | 37 | 19 |
| 40 | PN 40 | 4 x M 16 | 43 | 25 |
| 50 | PN 40 | 4 x M 16 | 55 | 31 |
| 65 | PN 16 | 8 x M 16 * | 51 | 42 |
| 65 | PN 40 | 8 x M 16 | 38 | 21 |
| 80 | PN 40 | 8 x M 16 | 47 | 25 |
| 100 | PN 16 | 8 x M 16 | 39 | 30 |
| 125 | PN 16 | 8 x M 16 | 53 | 40 |
| 150 | PN 16 | 8 x M 20 | 68 | 47 |
| 200 | PN 10 | 8 x M 20 | - | 68 |
| 200 | PN 16 | 12 x M 20 | - | 45 |
| 250 | PN 10 | 12 x M 20 | - | 65 |
| 250 | PN 16 | 12 x M 24 | - | 78 |
| 300 | PN 10 | 12 x M 20 | - | 76 |
| 300 | PN 16 | 12 x M 24 | - | 105 |
| 350 | PN 10 | 16 x M 20 | - | 75 |
| 400 | PN 10 | 16 x M 24 | - | 104 |
| 450 | PN 10 | 20 x M 24 | - | 93 |
| 500 | PN 10 | 20 x M 24 | - | 107 |
| 600 | PN 10 | 20 x M 27 | - | 138 |
| 700 | PN 10 | 24 x M 27 | - | 163 |
| 800 | PN 10 | 24 x M 30 | - | 219 |
| 900 | PN 10 | 28 x M 30 | - | 205 |
| 1000 | PN 10 | 28 x M 33 | - | 261 |
* DN65 / PN16: tiêu chuẩn 8 lỗ bulông; 4 lỗ theo yêu cầu. Giá trị chỉ tham khảo.* DN65 / PN16 is available with standard 8 bolt holes; 4 bolt holes on request. Values are indicative only.
| Cỡ [inch]Size [inch] | ClassClass | BulôngBolts | PolypropylenePolypropylene | Hard rubberHard rubber |
|---|---|---|---|---|
| 1 | 150 | 4 x 1/2" | 6.7 | 3.2 |
| 1 1/2 | 150 | 4 x 1/2" | 13 | 9 |
| 2 | 150 | 4 x 5/8" | 24 | 17 |
| 3 | 150 | 4 x 5/8" | 43 | 29 |
| 4 | 150 | 8 x 5/8" | 34 | 23 |
| 6 | 150 | 8 x 3/4" | 61 | 38 |
| 8 | 150 | 8 x 3/4" | - | 51 |
| 10 | 150 | 12 x 7/8" | - | 58 |
| 12 | 150 | 12 x 7/8" | - | 77 |
| 14 | 150 | 12 x 1" | - | 69 |
| 16 | 150 | 16 x 1" | - | 67 |
| 18 | 150 | 16 x 1 1/8" | - | 105 |
| 20 | 150 | 20 x 1 1/8" | - | 94 |
| 24 | 150 | 20 x 1 1/4" | - | 133 |
| 28 | 150 | 28 x 1 1/4" | - | 119 |
| 32 | 150 | 28 x 1 1/2" | - | 191 |
| 36 | 150 | 32 x 1 1/2" | - | 198 |
| 40 | 150 | 36 x 1 1/2" | - | 198 |
| Cỡ [inch]Size [inch] | ClassClass | BulôngBolts | PolypropylenePolypropylene | Hard rubberHard rubber |
|---|---|---|---|---|
| 1 | 300 | 4 x 5/8" | 11 | 5 |
| 1 1/2 | 300 | 4 x 3/4" | 29 | 20 |
| 2 | 300 | 8 x 5/8" | 18 | 13 |
| 3 | 300 | 8 x 3/4" | 44 | 30 |
| 4 | 300 | 8 x 3/4" | 69 | 47 |
| 6 | 300 | 12 x 3/4" | 62 | 38 |
| 8 | 300 | 12 x 7/8" | - | 60 |
| 10 | 300 | 16 x 1" | - | 75 |
| 12 | 300 | 16 x 1 1/8" | - | 113 |
| 14 | 300 | 20 x 1 1/4" | - | 71 |
| 16 | 300 | 20 x 1 1/4" | - | 92 |
| 18 | 300 | 24 x 1 1/4" | - | 108 |
| 20 | 300 | 24 x 1 1/4" | - | 121 |
| 24 | 300 | 24 x 1 1/2" | - | 189 |

MA-C p.52
Hình: Figure: Vòng tiếp địa số 1, 2, 3Grounding rings no. 1, 2, 3 MA-S p.26 xem hình trên trang Datasheetsee figure on the Datasheet page ↗
| LoạiType | ≤ DN300≤ DN300 / 12" | ≥ DN350≥ DN350 / 14" | Đặc điểmFeature |
|---|---|---|---|
| Số 1No. 1 | 3 mm | 4 mm (tantalum: 0.5 mm)4 mm (tantalum: 0.5 mm) | –– |
| Số 2No. 2 | 3 mm | 4 mm | Chống hỏng mặt bích khi vận chuyển, lắp đặtPrevents damage to the flanges during transport and installation |
| Số 3No. 3 | 3 mm | 4 mm | Có cổ trụ (dài 30 mm cho DN25…150); bảo vệ lót khỏi môi chất mài mònWith cylindrical neck (30 mm for DN25...150); liner protection against abrasive fluids |
Với ống cách điện bên trong (có lót) hoặc ống nhựa, có thể đo không cần vòng/điện cực tiếp địa: bộ khuếch đại đầu vào tạo điện áp tương ứng điện thế của môi chất không nối đất và dùng làm điện thế tham chiếu. Dùng được cả khi đường ống có điện áp/dòng điện (điện phân, mạ).For pipelines electrically insulated inside (liner or plastic), measurement without grounding rings or electrodes is possible: the input amplifier creates a voltage corresponding to the potential of the ungrounded medium as reference. Also possible with voltages/currents in the pipelines (electrolysis, galvanic). MA-C p.53
Hình: Figure: Virtual reference – không vòng tiếp địaVirtual reference – no grounding rings MA-S p.27 xem hình trên trang Datasheetsee figure on the Datasheet page ↗
| Tiêu chíCriterion | Giá trịValue |
|---|---|
| CỡSize | ≥ DN10 |
| Độ dẫn điệnElectrical conductivity | ≥ 200 µS/cm |
| Cáp tín hiệuSignal cable | Chỉ loại A (DS 300)Use only A (type DS 300) |
| Chiều dài cápSignal cable length | ≤ 50 m |
Lợi ích theo MA-S: bỏ được vòng/điện cực tiếp địa, ít điểm rò rỉ, lắp đặt dễ hơn, phù hợp chứng nhận OIML R49 và MID MI-001 (IFC 300).Benefits per MA-S: grounding rings or electrodes can be omitted, fewer potential leakage points, easier installation, compliant with OIML R49 and MID MI-001 certification (IFC 300). MA-S p.27

MA-C p.18
Converter gắn trực tiếp trên cảm biến – lắp theo hướng dẫn lắp cảm biến.The converter is mounted directly on the sensor – follow the sensor installation instructions. MA-C p.19
MA-C p.19
MA-C p.20
| VỏHousing | Khoảng cáchDistance |
|---|---|
| F | a ≥ 600 mm · b ≥ 250 mm |
| W | a ≥ 240 mm |
MA-C p.21
MA-C p.22–23
Mở vỏ W: xoay khóa sang phải rồi mở nắp. Bên trong có ngăn đấu cảm biến, ngăn I/O và ngăn nguồn có nắp an toàn chống điện giật.Opening W: turn the lock to the right and open the cover. Inside: sensor terminal compartment, I/O compartment and power compartment with shock-hazard safety cover. MA-C p.15
Lạc ViệtVới OPTIFLUX 2300 F ở hố van/hố đo: đặt IFC 300 F ở vị trí khô, cao hơn mức ngập, có mái che nắng; chừa đủ khoảng trống phía dưới cho cáp đi vòng (xem mục đi cáp).For OPTIFLUX 2300 F in valve/meter pits: place the IFC 300 F in a dry spot above flood level with a sun shade; leave room below for cable loops (see cable routing).
MA-C p.25, p.27, p.33
| CápCable | DNDN | Độ dẫn tối thiểuMin. conductivity | Đường congCurve |
|---|---|---|---|
| A (DS 300) | 25…150 | 5 µS/cm | A1 |
| A (DS 300) | 200…2000 | 5 µS/cm | A2 |
| B (BTS 300) | 25…150 | 5 µS/cm | B3 |
| B (BTS 300) | 200…2000 | 5 µS/cm | B4 |
Nước khử khoáng: độ dẫn ≥ 20 µS/cm. Chiều dài tối đa cáp A/B 600 m tùy độ dẫn và phiên bản cảm biến (MA-C p.148). Bảng manual chỉ ghi đến DN2000.Demineralised water: conductivity ≥ 20 µS/cm. Max. length of cable A/B 600 m depending on conductivity and sensor version (MA-C p.148). The manual table only lists up to DN2000.
Môi chất trên 150 °C cần cáp tín hiệu đặc biệt và hộp nối trung gian ZD. Độ dẫn điện tối thiểu phụ thuộc loại và chiều dài cáp.For medium temperatures above 150°C a special signal cable and a ZD intermediate socket are necessary. Min. conductivity depends on type and length of the signal cable. MA-C p.32, p.36
| Thông sốParameter | Yêu cầuRequirement |
|---|---|
| Điện dung lõi/lõiCapacitance conductor/conductor | < 50 pF/m |
| Điện dung lõi/lướiCapacitance conductor/shield | < 150 pF/m |
| Điện trở cách điệnInsulation resistance | Riso > 100 GΩ x km |
| Vmax / Imax | < 24 V / < 100 mA |
| Điện áp thử lõi/lưới trongTest voltage conductor/inner shield | 500 V |
| Điện áp thử lõi/lõiTest voltage conductor/conductor | 1000 V |
| Điện áp thử lõi/lưới ngoàiTest voltage conductor/outer shield | 1000 V |
| Xoắn lõiTwisting | ≥ 10 vòng/m (chống nhiễu từ)≥ 10 twists per meter (magnetic screening) |
| Cáp / đầuCable / end | VỏHousing | aa | bb |
|---|---|---|---|
| A – converterA – converter | F | 80 mm | 10 mm |
| A – converterA – converter | W | 80 mm | – |
| B – converterB – converter | F | 80 mm | 10 mm |
| B – converterB – converter | W | 80 mm | – |
| A / B – cảm biếnA / B – sensor | Hộp đấu cảm biếnSensor box | 50 mm | 10 mm |
| C – converterC – converter | F / W | 80 mm | – |
| C – cảm biếnC – sensor | Hộp đấu cảm biếnSensor box | 50 mm | – |
MA-C p.29–35
Cáp C không nằm trong phạm vi giao hàng. Vỏ W: cực đấu nhận dây mềm ≤ 1.5 mm², dây cứng ≤ 2.5 mm². Đầu converter tuốt a = 80 mm; đầu cảm biến a = 50 mm; bấm cos lên lõi 7, 8, 9.Cable C is not included in the delivery. W housing terminals: flexible ≤ 1.5 mm² / AWG 14, solid ≤ 2.5 mm² / AWG 12. Converter end a = 80 mm; sensor end a = 50 mm; crimp ferrules on conductors 7, 8 and 9. MA-C p.37–38, p.41
| Chiều dàiLength | Tiết diện CuCross-section Cu | AWGAWG |
|---|---|---|
| 0…150 m | 3 x 0.75 mm² | 3 x 18 |
| 150…300 m | 3 x 1.5 mm² | 3 x 14 |
| 300…600 m | 3 x 2.5 mm² | 3 x 12 |
| Màu dâyWire colour | Số dâyWire no. | Cực converterConverter terminal | Chức năngFunction |
|---|---|---|---|
| TrắngWhite | 2 | 2 | Điện cực 1Sensor electrode 1 |
| ĐỏRed | 3 | 3 | Điện cực 2Sensor electrode 2 |
| Dây thoát lưới trongBraided shield drain wire | [1] | 1 | Chống nhiễu trong cho điện cực 1, 2Inner shield for electrode 1 and 2 |
| Lưới ngoàiBraided shield | [60] / [6] | F: kẹp giữ cáp · W: kẹp vỏ (đầu cos cắm)F: housing clip strain relief · W: housing clip (push-on connector) | Chống nhiễu ngoàiOuter shield |
| Màu dâyWire colour | Số dâyWire no. | Cực converterConverter terminal | Chức năngFunction |
|---|---|---|---|
| TrắngWhite | 2 | 2 | Điện cực 1Sensor electrode 1 |
| Dây thoátStranded drain wire | [20] | 20 | Bootstrap shield điện cực 1Bootstrap shield for electrode 1 |
| ĐỏRed | 3 | 3 | Điện cực 2Sensor electrode 2 |
| Dây thoátStranded drain wire | [30] | 30 | Bootstrap shield điện cực 2Bootstrap shield for electrode 2 |
| Dây thoát lưới trongBraided shield drain wire | 1 | 1 | Chống nhiễu trongInner shield |
| Lưới ngoàiBraided shield | [60] / [6] | F: kẹp giữ cáp · W: kẹp vỏ (đầu cos cắm)F: housing clip strain relief · W: housing clip (push-on connector) | Chống nhiễu ngoài (3 lớp)Outer shield for triple shielding |
| Màu dâyWire colour | Số dâyWire no. | Cực converterConverter terminal | Chức năngFunction |
|---|---|---|---|
| TrắngWhite | 7 | 7 | Cuộn 1Coil 1 |
| Xanh láGreen | 8 | 8 | Cuộn 2Coil 2 |
| ĐỏRed | 9 | 9 | Nhánh giữa cuộn 1 và 2 (tùy chọn)Middle branch coil 1 and coil 2 (optional) |
| Lưới bọcBraided shield | – | KHÔNG ĐẤUDO NOT CONNECT | Giáp chỉ bảo vệ cơ học (tùy chọn)Braided armour only for mechanical protection (optional) |

MA-C p.43

| Phương ánVariant | Dải dung saiTolerance | Công suấtConsumption | Ghi chúNote |
|---|---|---|---|
| 100…230 VAC, 50…60 Hz | -15% / +10% | 22 VA | 240 VAC + 5 % nằm trong dung sai; PE vào cực kẹp U240 VAC + 5% included; PE to U-clamp terminal |
| 12…24 VDC | 24 VDC: -55% / +30%24 VDC: -55% / +30% | 12 W | 12 VDC − 10 % nằm trong dung sai12 VDC - 10% included |
| 24 VAC/DC | AC: -15% / +10% · DC: -25% / +30% | 22 VA / 12 W | 12 V không nằm trong dung sai12 V not included |

MA-C p.53–54
MA-C p.68
IFC 300 có nhiều tổ hợp I/O. Basic I/O: 1 ngõ ra dòng (HART), 1 ngõ ra xung, 2 ngõ ra trạng thái/limit switch; ngõ ra xung đặt được thành status, một status đặt được thành control input. Modular I/O: cấu hình bằng module tùy nhiệm vụ. Bus (PROFIBUS, FF, Modbus, PROFINET): xem tài liệu riêng.IFC 300 is available with various I/O combinations. Basic I/O: 1 current output (HART), 1 pulse output and 2 status outputs/limit switches; the pulse output can be set as status output and one status output as control input. Modular I/O: configured with output modules as required. Bus systems: see separate documentation. MA-C p.56

Ví dụ: CG 300 11 100 = 100…230 VAC, màn hình chuẩn, Basic I/O (Ia hoặc Ip, Sp/Cp, Sp, Pp/Sp). CG 300 81 4EB = 24 VDC, Modular: Ia & Pa/Sa + module Pp/Sp & Ip. Dùng công cụ "Sơ đồ đấu dây theo mã CG" bên dưới.Examples: CG 300 11 100 = 100...230 VAC, standard display, Basic I/O (Ia or Ip, Sp/Cp, Sp, Pp/Sp). CG 300 81 4EB = 24 VDC, Modular: Ia & Pa/Sa + module Pp/Sp & Ip. Use the "Wiring by CG number" tool below. MA-C p.57
| I/OI/O | ActiveActive | PassivePassive |
|---|---|---|
| Ngõ ra dòng (HART)Current output (HART) | Vint,nom = 24 VDC · I ≤ 22 mA · RL ≤ 1 kΩ | Vext ≤ 32 VDC · I ≤ 22 mA · V0 ≥ 1.8 V · RL ≤ (Vext − V0) / Imax |
| Ngõ ra xung/tần sốPulse/frequency output | Chỉ Modular: Vnom = 24 VDC · I ≤ 20 mAModular only: Vnom = 24 VDC · I ≤ 20 mA | Vext ≤ 32 VDC · fmax ≤ 100 Hz: I ≤ 100 mA · 100 Hz < fmax ≤ 10 kHz: I ≤ 20 mAVext ≤ 32 VDC · fmax ≤ 100 Hz: I ≤ 100 mA · 100 Hz < fmax ≤ 10 kHz: I ≤ 20 mA |
| RL max ngõ ra xungRL, max pulse output | – | f ≤ 100 Hz: 47 kΩ · f ≤ 1 kHz: 10 kΩ · f ≤ 10 kHz: 1 kΩ |
| Ngõ ra trạng thái / limit switchStatus output / limit switch | Chỉ Modular: Vint = 24 VDC · I ≤ 20 mA · RL ≤ 47 kΩModular only: Vint = 24 VDC · I ≤ 20 mA · RL ≤ 47 kΩ | Vext ≤ 32 VDC · I ≤ 100 mA · RL,max = 47 kΩ |
| Ngõ vào điều khiểnControl input | Chỉ Modular: Vint = 24 VDCModular only: Vint = 24 VDC | Basic: 8 V ≤ Vext ≤ 32 VDC · Modular: 3 V ≤ Vext ≤ 32 VDCBasic: 8 V ≤ Vext ≤ 32 VDC · Modular: 3 V ≤ Vext ≤ 32 VDC |
| Ngõ vào dòng (Modular)Current input (Modular) | Vint,nom = 24 VDC · I ≤ 22 mA · no HART | Vext ≤ 32 VDC · I ≤ 22 mA · no HART |
Ngõ ra trạng thái mở khi mất nguồn. NAMUR (PN/SN): mở 0.6 mA, đóng 3.8 mA.Status outputs are open when de-energised. NAMUR (PN/SN): open 0.6 mA, closed 3.8 mA.
MA-C p.69–72
MA-C p.88–89, p.150, p.163–166
| Phiên bảnVersion | PVPV | SVSV | TVTV | 4V4V |
|---|---|---|---|---|
| Basic I/O | A | D | - | - |
| Modular I/O | C | D | A | B |
Mã biến: flow speed 20 · volume flow 21 · mass flow 22 · coil temperature 23 · conductivity 24 · diagnosis value 25 · counter 1 (C) 6 (Basic) · counter 1 (B) 13 · counter 2 (D) 14 · counter 3 (A) 12 (Modular).Codes: flow speed 20 · volume flow 21 · mass flow 22 · coil temperature 23 · conductivity 24 · diagnosis value 25 · counter 1 (C) 6 (Basic) · counter 1 (B) 13 · counter 2 (D) 14 · counter 3 (A) 12 (Modular).
PV luôn gắn với ngõ ra dòng HART nên không gán được biến bộ đếm cho PV. Biến bộ đếm chỉ gán cho SV/TV/4V khi ngõ ra tương ứng không phải ngõ ra dòng hoặc tần số.PV is always connected to the HART current output, so a totalizer cannot be assigned to PV. Totalizers can only be assigned to SV, TV, 4V if the connected output is not a current or frequency output. MA-C p.169
MA-C p.90
Hệ đo được giao sẵn sàng hoạt động, thông số đã cài tại nhà máy theo đơn hàng. Khi cấp nguồn, thiết bị tự kiểm tra rồi bắt đầu đo ngay. Phím ↑ ↓ chuyển giữa 2 trang giá trị đo, trang đồ thị và trang trạng thái.The measuring device is supplied ready for operation with factory settings per the order. On power-up a self test runs, then measurement starts immediately. Keys ↑ and ↓ switch between the two measured value pages, the trend page and the status list. MA-C p.90MA-S p.10
Lạc ViệtSau khi chạy ổn định với ống đầy: đối chiếu C1.1.2 (DN), C1.1.4/5 (GK/GKL), C1.1.13 (tần số kích từ) với nameplate, kiểm tra chiều dòng (C1.2.2), dải 4–20 mA (C2.x.6), giá trị xung (C2.x.6) với SCADA rồi lưu backup 1 (C5.6.2). Ghi kết quả vào tab Nghiệm thu.Once stable with a full pipe: compare C1.1.2 (DN), C1.1.4/5 (GK/GKL), C1.1.13 (field frequency) with the nameplate, check flow direction (C1.2.2), 4–20 mA range (C2.x.6) and pulse value (C2.x.6) against SCADA, then save backup 1 (C5.6.2). Record results in the Commissioning tab.
Màn hình LCD đồ họa 128 × 64 điểm, đèn nền trắng; 4 phím cơ hoặc 4 phím quang thao tác không cần mở vỏ. Phím quang: chạm thẳng góc phía trước kính – chạm từ bên cạnh có thể thao tác sai.Graphic LC display 128 x 64 pixels, white backlight; 4 push buttons or 4 optical keys, operated without opening the housing. Optical keys switch directly in front of the glass – activate at right angles; touching from the side can cause incorrect operation. MA-C p.91, p.146
| Chế độMode | >> | ↲↲ | ↓ / ↑↓ / ↑ | Esc (> + ↑)Esc (> + ↑) |
|---|---|---|---|---|
| ĐoMeasuring | Giữ 2.5 s: vào menu (ở trang trạng thái: vào danh sách thông báo)Hold 2.5 s: enter menu (on status page: status messages) | Reset màn hìnhReset display | Chuyển trang đo 1, 2, đồ thị, trạng tháiSwitch 1st/2nd measuring page, graphic, status page | – |
| MenuMenu | Vào menu đang hiện (hiện submenu đầu)Access displayed menu (1st submenu shown) | Lên cấp trên, hoặc về chế độ đo (hỏi có lưu dữ liệu không)Back one level, or to measuring mode with a prompt whether to save data | Chọn mụcSelect menu item | – |
| Thông sốParameter | Số: dời con trỏ sang phảiNumbers: move cursor one position right | Về menuReturn to menu mode | Đổi số, đơn vị, thuộc tính, dời dấu thập phânChange number, unit, property, move decimal point | Về menu, không nhận dữ liệuReturn to menu without accepting data |
| ChữLetter | Trạng tháiStatus | Ý nghĩaMeaning |
|---|---|---|
| F (đậm, nền trắng)F (bold, white) | Lỗi thiết bịError in device | Không đo đượcNo measurement possible |
| F (nền xanh)F (blue) | Lỗi ứng dụngApplication error | Không đo được do điều kiện quá trình; thiết bị vẫn tốtNo measurement due to process conditions; device OK |
| S | Ngoài thông sốOut of specification | Có giá trị nhưng không đủ chính xác, cần kiểm traValues available but not accurate enough – check |
| M | Cần bảo trìMaintenance required | Còn chính xác nhưng có thể sớm thay đổiStill accurate but could soon change |
| C | Đang kiểm traChecks in progress | Giá trị hiển thị/truyền đi không phải giá trị thựcDisplayed/transferred value is not the actual value |
| I | Thông tinInformation | Không ảnh hưởng trực tiếp phép đoNo direct influence on measurement |
Adapter quang IR giao tiếp PC với converter không cần mở vỏ. Sau khi kích hoạt (A6 hoặc C5.6.6), phải gắn adapter bằng giác hút trong 60 giây; khi kích hoạt, LED sáng và phím quang ngừng hoạt động. Adapter không nằm trong phạm vi giao hàng.The optical IR adapter enables PC communication without opening the housing. After activation (A6 or C5.6.6), attach it with the suction cups within 60 seconds; the LED lights and the optical keys stop working. The adapter is not part of the delivery. MA-C p.96
| PhímKey | Màn hìnhDisplay | Ghi chúNote |
|---|---|---|
| > (giữ 2.5 s)> (hold 2.5 s) | A quick setup | Nhả phímRelease the key |
| > | A1 language | – |
| 2 x ↓ | A3 reset | – |
| > | A3.1 reset errors | – |
| ↓ | A3.2 / A3.3 / A3.4 | Chọn bộ đếm (bộ đếm 3 là tùy chọn)Select counter (counter 3 optional) |
| > | reset counter? no | – |
| ↓ / ↑ | reset counter? yes | – |
| ↲ | A3.x | Đã resetCounter has been reset |
| 3 x ↲ | Chế độ đoMeasuring mode | – |
Có thể cần bật cho phép reset ở C5.9.1…C5.9.3.Resetting may need to be activated in C5.9.1…C5.9.3.
| PhímKey | Màn hìnhDisplay | Ghi chúNote |
|---|---|---|
| > (giữ 2.5 s)> (hold 2.5 s) | A quick setup | Nhả phímRelease the key |
| > | A1 language | – |
| 2 x ↓ | A3 reset | – |
| > | A3.1 reset errors | – |
| > | reset errors? no | – |
| ↓ / ↑ | reset errors? yes | – |
| ↲ | A3.1 reset errors | Đã xóa lỗiError has been reset |
| 3 x ↲ | Chế độ đoMeasuring mode | – |
Cấu hình từ xa: PACTware (DTM), HART Hand Held Communicator, AMS (Emerson), PDM (Siemens); DTM/driver tải miễn phí từ website KROHNE.Remote configuration: PACTware (DTM), HART Hand Held Communicator, AMS (Emerson), PDM (Siemens); DTMs and drivers are free from the KROHNE website. MA-C p.146
Lạc ViệtToàn bộ cây menu A/B/C với tùy chọn và dải giá trị có ở tab Mô phỏng menu – bấm thử từng phím trước khi ra hiện trường.The complete A/B/C menu tree with options and ranges is in the Menu simulator tab – practise the keys before going on site.
MA-S p.28MA-C p.130
MA-S p.29
Trước khi tháo dỡ: tháo khỏi đường ống, làm sạch, cắt nguồn; dùng bảo hộ, bàn làm việc chắc chắn; dụng cụ: bộ tua vít Torx, Pozidriv, cờ lê 10–27 mm. Thiết bị không có pin bên trong (trừ bản HART7 có pin cúc ~1 g cho đồng hồ thời gian thực) và tuân thủ RoHS.Before disassembly: remove from the pipeline, clean, disconnect power; wear PPE, use a stable bench; tools: Torx and Pozidriv sets, wrench 10–27 mm. The device has no battery (except HART7 versions with a ~1 gram button cell for the real time clock) and is RoHS compliant. MA-C p.133, p.139
Lạc ViệtBảo trì định kỳ gợi ý: xem trang trạng thái (↑↓) và B2 giá trị thực (độ dẫn, nhiễu điện cực, profile, nhiệt độ cuộn) mỗi lần kiểm tra; so sánh với giá trị lúc nghiệm thu để phát hiện bám cặn điện cực sớm. Kiểm tra hiệu chuẩn tại chỗ có thể dùng OPTICHECK – hỏi Lạc Việt.Suggested routine: check the status page (↑↓) and B2 actual values (conductivity, electrode noise, flow profile, coil temperature) each visit; compare with commissioning values to catch electrode fouling early. On-site verification can use OPTICHECK – ask Lạc Việt.
Các điểm hai cuốn manual (và TD) mâu thuẫn hoặc tự mâu thuẫn. Giữ nguyên chữ gốc – cần xác nhận với KROHNE trước khi dùng cho hồ sơ.Points where the manuals (and TDs) contradict each other or themselves. Original wording kept – confirm with KROHNE before using in documents.
Lạc ViệtLộ trình rút gọn do Lạc Việt biên soạn; mỗi bước dẫn sang mục chi tiết có trang manual.Condensed route compiled by Lạc Việt; each step links to the detailed section with manual pages.
Lạc ViệtTrình tự kiểm tra do Lạc Việt tổng hợp từ manual và kinh nghiệm hiện trường; mỗi bước dẫn trang manual khi có.Check sequences compiled by Lạc Việt from the manuals and field experience; each step cites a manual page where available.
Lạc ViệtChecklist do Lạc Việt biên soạn theo hai manual (mỗi mục ghi trang). Dữ liệu lưu trên trình duyệt này; bấm "Xuất Word" để tải biên bản .doc.Checklist compiled by Lạc Việt from the two manuals (each item cites a page). Data is kept in this browser; click "Export Word" for a .doc report.
Nhập 3 ký tự cuối mã CG (B3.1 / C5.1.2 hoặc nameplate), ví dụ 100, 4EB, 7FK.Enter the last 3 characters of the CG number (B3.1 / C5.1.2 or nameplate), e.g. 100, 4EB, 7FK.
Cảm biến OPTIFLUX 2000 + converter IFC 300 F (bản rời), nối bằng cáp tín hiệu (DS 300 hoặc BTS 300) và cáp kích từ 3 lõi. Bản rời giao 2 kiện.OPTIFLUX 2000 sensor + IFC 300 F remote converter, connected by a signal cable (DS 300 or BTS 300) and a 3-wire field current cable. Delivered in two cartons. MA-C p.12MA-S p.9
Sau co 2 chiều ≥ 5 DN, co 3 chiều ≥ 10 DN, sau ngã ba T ≥ 10 DN; phía sau ≥ 2 DN. 0D/0D chỉ trong phạm vi chứng nhận OIML R49/MID với IFC 300.After 2-D bends ≥ 5 DN, 3-D bends ≥ 10 DN, behind a T ≥ 10 DN; outlet ≥ 2 DN. 0D/0D only within the OIML R49/MID certified scope with IFC 300. MA-S p.14, p.16
Ống không dẫn điện và ống kim loại có phủ trong: cần vòng tiếp địa – hoặc dùng virtual reference nếu độ dẫn ≥ 200 µS/cm và cáp DS ≤ 50 m.Non-conductive and internally coated metal pipes need grounding rings – or virtual reference if conductivity ≥ 200 µS/cm and DS cable ≤ 50 m. MA-S p.25, p.27MA-C p.53
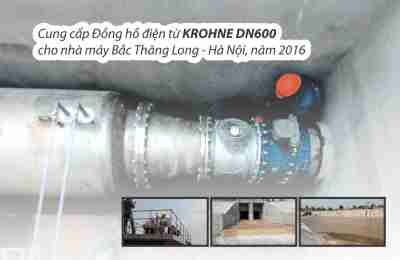
Cảm biến chịu ngập liên tục, cột nước 10 m (IP68, NEMA 6P theo MA-S); converter IFC 300 F (IP66/67) đặt chỗ khô trên tường hố. Ghi IP68 trong order code và xác nhận với KROHNE.The sensor withstands continuous submersion, 10 m water column (IP68, NEMA 6P per MA-S); IFC 300 F (IP66/67) in a dry place on the pit wall. Specify IP68 in the order code and confirm with KROHNE. MA-S p.20
Đến 600 m tùy độ dẫn và phiên bản cảm biến (đường cong A1/A2, B3/B4). Với virtual reference tối đa 50 m, chỉ cáp A.Up to 600 m depending on conductivity and sensor version (curves A1/A2, B3/B4). With virtual reference max. 50 m, cable A only. MA-C p.32, p.36, p.53, p.148
Theo mã CG/nhãn trong nắp ngăn đấu. Active: converter cấp 24 V, RL ≤ 1 kΩ. Passive: Vext ≤ 32 VDC, RL ≤ (Vext − 1.8 V)/22 mA. Không dùng A+ và A− cùng lúc.Per CG number/sticker. Active: converter supplies 24 V, RL ≤ 1 kΩ. Passive: Vext ≤ 32 VDC, RL ≤ (Vext - 1.8 V)/22 mA. Never use A+ and A- together. MA-C p.17, p.71
Ở chế độ đo, giữ phím > 2.5 giây. ↑↓ chọn, > vào, ↲ lùi; Esc = > + ↑. Sau 5 phút không thao tác tự về chế độ đo, không lưu.In measuring mode hold > for 2.5 s. ↑↓ select, > enter, ↲ back; Esc = > + ↑. After 5 min inactivity it returns to measuring mode without saving. MA-C p.91–93
> (2.5 s) → > → 2×↓ (A3 reset) → > → ↓ chọn A3.2/3.3/3.4 → > → ↑/↓ chọn yes → ↲ → 3×↲. Có thể phải bật ở C5.9.1…3.> (2.5 s) → > → 2×↓ (A3 reset) → > → ↓ to A3.2/3.3/3.4 → > → ↑/↓ yes → ↲ → 3×↲. May need activation in C5.9.1…3. MA-C p.122
Một hoặc hai điện cực không chạm môi chất: ống không đầy hoặc điện cực bị phủ (dầu). Kiểm tra lắp đặt, vệ sinh, ngưỡng C1.3.2.One or two electrodes not in contact with the medium: pipe not full or electrodes coated (oil). Check installation, clean, threshold C1.3.2. MA-C p.125
Kiểm tra tiếp địa, cáp tín hiệu, bọt khí; bật pulse filter C1.2.4 / noise filter C1.2.7; tăng time constant. Xem tab Tra lỗi.Check grounding, signal cable, gas bubbles; enable pulse filter C1.2.4 / noise filter C1.2.7; increase time constant. See Troubleshooting tab. MA-C p.106, p.127
Tải ≥ 230 Ω tại điểm đo HART. Basic: cực A; Modular: cực C. Multi-drop tối đa 15 thiết bị, dòng cố định 4 mA.Load ≥ 230 Ω at the HART test point. Basic: terminal A; Modular: terminal C. Multi-drop up to 15 devices, fixed 4 mA. MA-C p.88, p.150, p.166
Lót hard rubber: 20 × M24, tối đa 107 Nm (tham khảo, bích thép carbon). Siết chéo 50 % → 80 % → 100 %.Hard rubber liner: 20 x M24, max. 107 Nm (indicative, carbon steel flanges). Cross-tighten 50% → 80% → 100%. MA-S p.21–22
Hoàng Cường · Công ty CP Tư vấn Thương mại Lạc Việt – nhà phân phối KROHNE ngành nước tại Việt NamCông ty CP Tư vấn Thương mại Lạc Việt – KROHNE water-sector distributor in Vietnam
Giao hàng trên toàn quốc
Thành tiền: